Related Contents:
- Burn videos or photos to a CD
- Burn photos to DVD
- Create a web photo album
Part 1: Burn videos or photos to a CD
With VideoFlick, any computer user can copy or burn pictures and videos to a writeable CD disc. The following instructions explain how to burn photos or videos to a CD using VideoFlick.
Step 1 Insert a writable CD into your computer’s CD recorder.
Step 2 Import your photos or videos by clicking “Import Picture/Video” and choosing the photo or video folder. Select the photos or videos you want to merge.
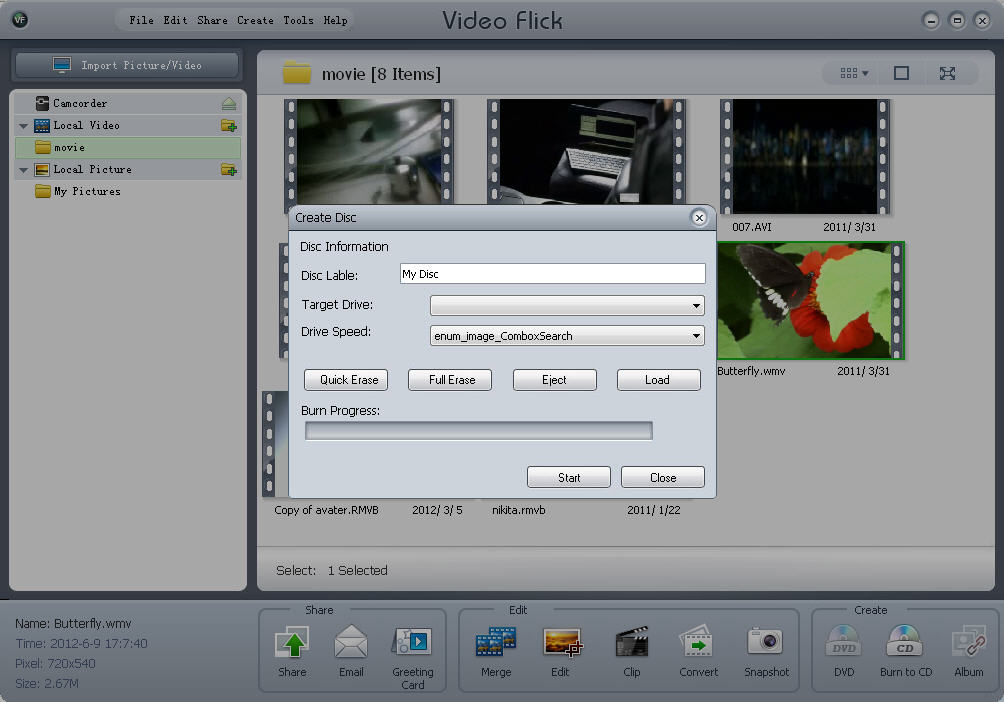
Step 3 Click “Burn to CD” button to turn to “Merge” box. Here we take “burn video to CD” as an example.
Step 4 Personalize your CD by setting: Disc Label, Target Drive, Drive Speed
Step 5 Click “Start”, few minutes later, the photo or video to CD burning progress will be finished.
Part 2: Burn photos to DVD
Besides burning photos to CD disc, you can also burn or copy your loved photos to DVD disc. Let’s see how it works:
Step 1 Import your photos by clicking “Import Picture/Video” and choosing your photo folder. Select the photos you plan to burn to the DVD.
Step 2 Insert a blank DVD into your DVD-burning drive.
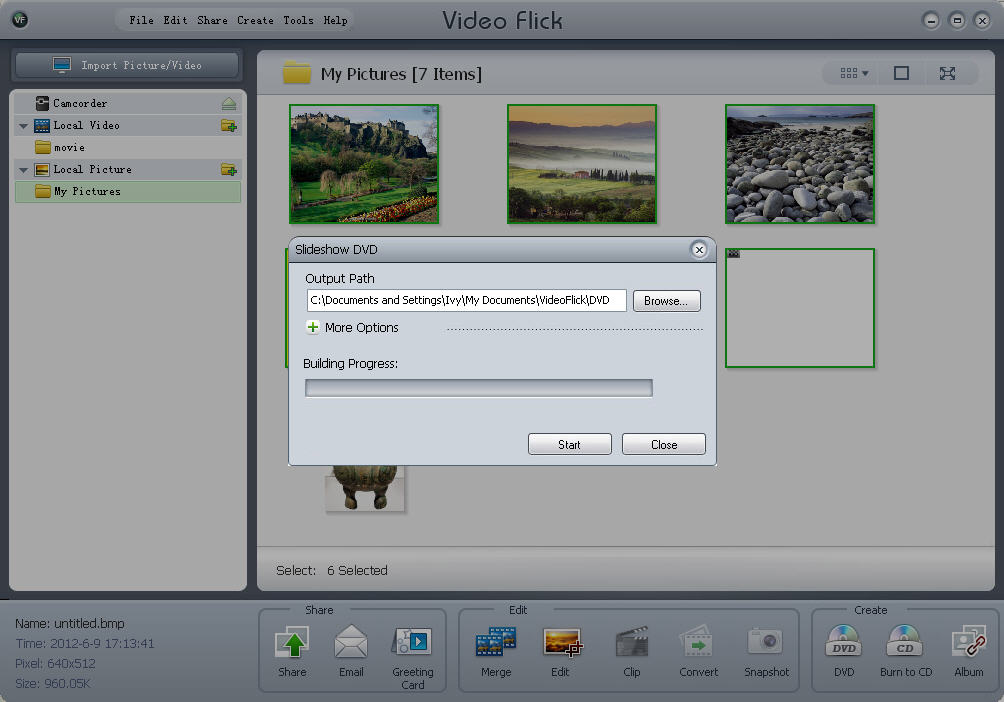
Step 3 Click “DVD” button to turn to the “Slideshow DVD” window.
Step 4 Set the output path and click “Start” button.
Part 3: Create a web photo album
VideoFlick makes everything so simple to create a web photo album of all the photos in a directory. Follow the steps to learn how to create your web photo album:
Step 1 Import your photos by clicking “Import Picture/Video” and choosing your photo folder. Select the photos you want to create web album.
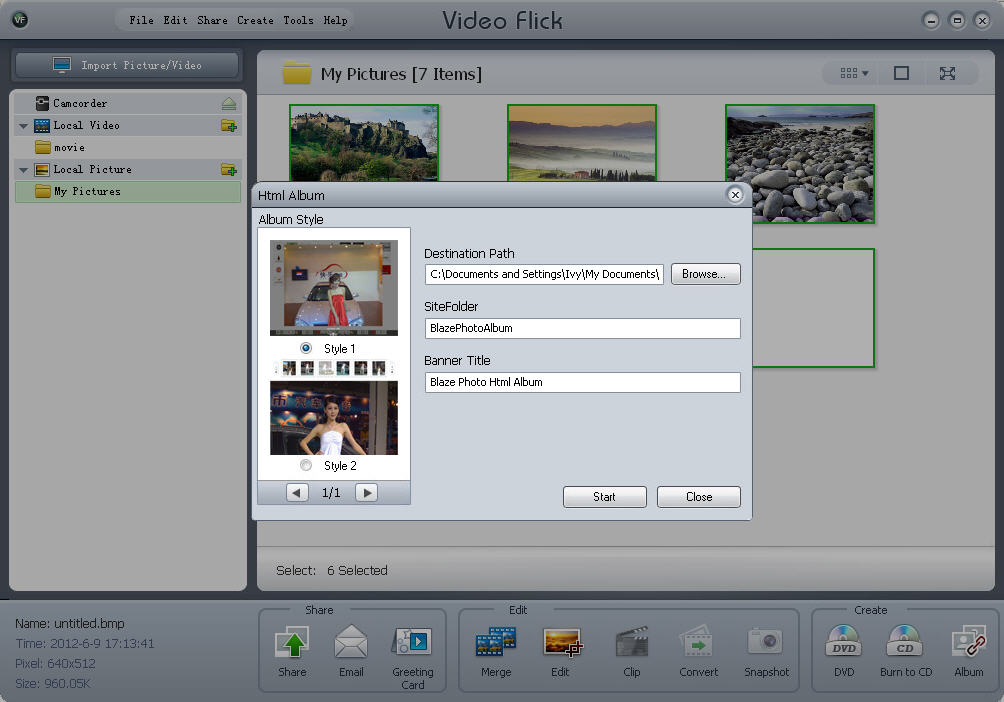
Step 2 Click “Album” button to appear “HTML Album” window.
Step 3 Custom your web album: set destination path, sitefolder, banner title.
Step 4 Click “Start” to create your own photo web album instantly.


No comments:
Post a Comment